7-days Lemosho route & 5-days wildlife safari
Kilimanjaro via Lemosho Route.
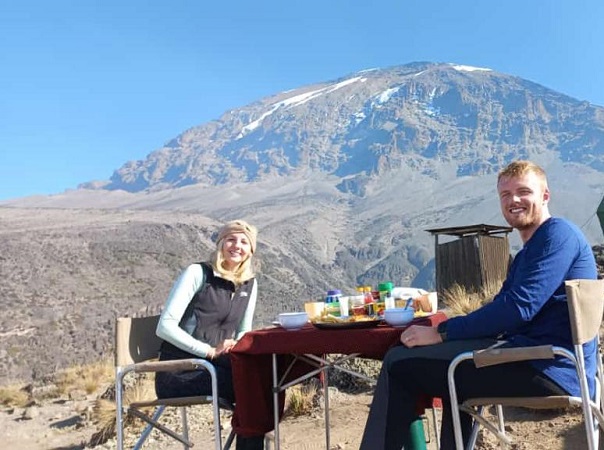
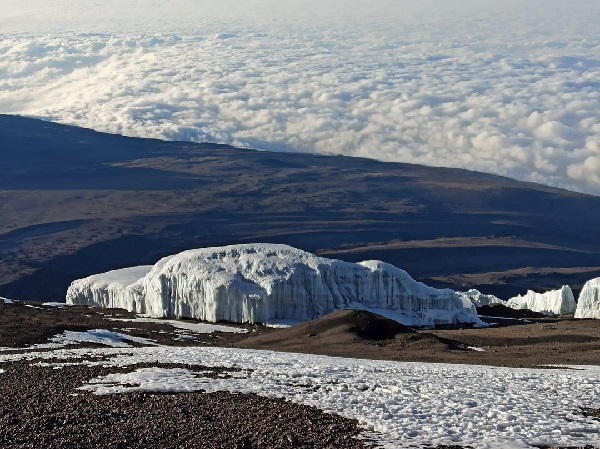
Major Attractions:Mt.Kilimanjaro,freestanding mountain in the world.
Mountain Guides Language: English,Germany,French.
Start From: Moshi.
Ending : Moshi.
Route Info: Hike to Kilimanjaro Lemosho Route – Lemosho route is traditionally one of the quieter and lesser-known routes on the mountain. It’s also the newest and probably the most diverse in terms of the ecological systems and landscapes it passes through. The first two days of this route take you through lush rainforest before you emerge into heath and moorland then join the Machame Route on the third day. This narrow trail, which begins on the Western side of Kilimanjaro, has some very steep and undulating sections. Arriving day Kilimanjaro airport to Moshi
Day 0: Arrive in Tanzania
You will be picked up at the Kilimanjaro International Airport and transferred to your hotel in Moshi town; you
will meet your guide who will brief you on your upcoming trek and do an equipment check to make sure you have all the
necessary mountain gear. The missing gear can be rented on this day.Meals: No Meals Included.
Day 1: Drive to Kilimanjaro National Park Londorossi Gate, Hike to Mti Mkubwa Camp
After breakfast and briefing, drive to Londorossi Park Gate for park registration and check the bags.
(About a 4-hour drive). After doing everything at Londorossi gate. Then drive back to starting point here a forest track
requiring a 4WD vehicle leads to Lemosho starting point. For the lunch then start Walking along forest trails to
Mti Mkubwa (big tree) campsite.
Day 2: Hike Mti Mkubwa Camp to Shira 1 Camp
Early breakfast and Medical checkup we leave the camp, and start the climb towards the heath and moorland zone. A couple hours after lunch we cross into the Shira Caldera, a high altitude desert plateau, very different from the rain forest. A high altitude desert, Shira is the one among the three peaks which erupted in Kilimanjaro ecosystem. The peak later collapsed and formed a crater which eventually became filled with the lava flow from Kibo peak. Its rim is eroded and blasted away by weather and volcanic action. Weather and volcanic action have decimated the crater rim. Today you’ll get your first close views of Kibo – the summit of Kilimanjaro.
Day 3 :Hike Shira 1 Camp to Shira 2
This day after breakfast then medical checkup you will trek to east across Shira plateau visiting Shira Cathedral
Peak (3850m) for acclimatization. At this peak you will have great views of both Mt. Meru and Kibo
Peak and other many spectacular special features then continue walk to Shira Two camp for hot meal then having a short rest before going for acclimatization after back to the camp for tea, coffee, hot chocolates with popcorn or nuts, dinner and overnight here.
Day 4 :Shira Camp to Lava Tower to Barranco Camp
From the Shira Plateau we continue to the east up a ridge, passing the junction towards the peak of Kibo. As we continue, our direction changes to the South East towards the Lava Tower, called the “Shark’s Tooth” (elev 4650m/15,250ft). Shortly after the tower we come to the second junction which goes to the Arrow Glacier. We now continue down to the Barranco Camp. Although you end the day around the same elevation as when you began, this day is very important for acclimatization and will help your body prepare for summit day.
Day 5 : Barranco Camp to Barafu Camp
Early morning breakfast, as it going to be a long walking day, we leave Barranco and continue on a steep ridge up the Barranco Wall (elev 4250m/13,900ft), through the Karanga Valley (elev 4050m/13,250ft) to the junction which connects with the Mweka Trail. We continue up to the Barafu Camp. You have completed the South Circuit, which offers views of the summit from many different angles. Here we make camp with views of the summit in the distance.
Day 6: Barafu Camp to Summit, down to Mweka Camp
Very early in the morning (midnight to 2 am), we continue our way to the summit between the Rebmann and Ratzel glaciers. You head in a northwesterly direction and ascend through heavy scree towards Stella Point on the crater rim. This is the most mentally and physically challenging portion of the trek. At Stella Point you will stop for a short rest and will be rewarded with the most magnificent sunrise you are ever likely to see. Faster hikers may view the sunrise from the summit.
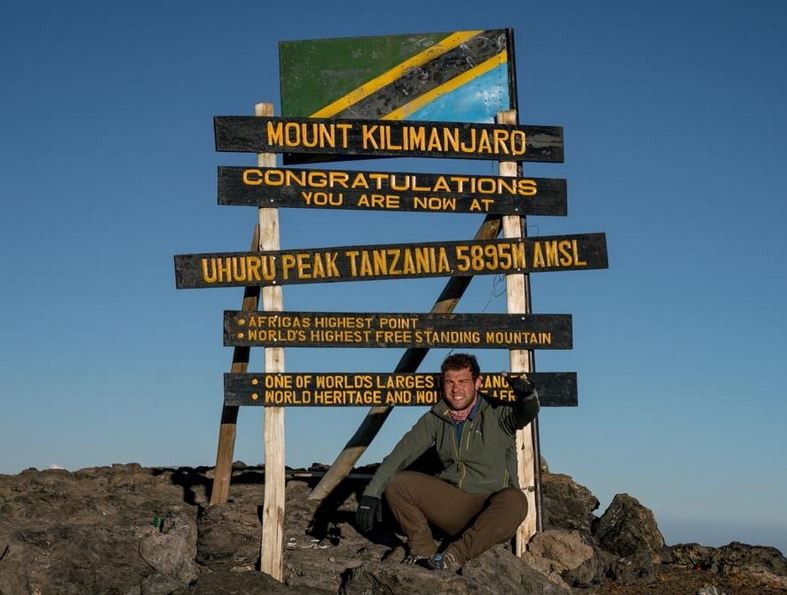
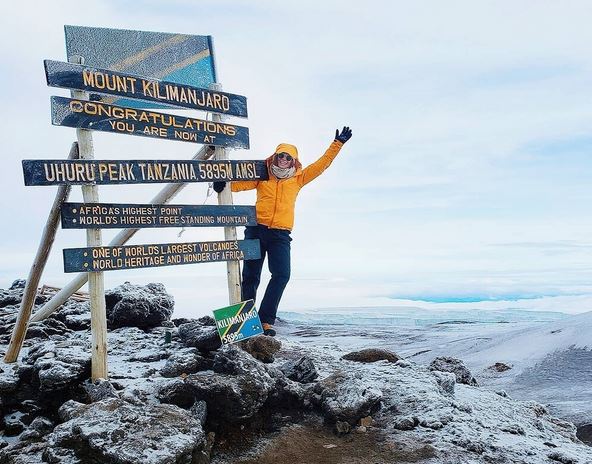
From Stella Point, you may encounter snow all the way on your 1-hour ascent to the summit. Once Uyou reach Uhuru peak the highest point on Mount Kilimanjaro and the continent of Africa!
From the summit we begin our descent by continuing straight down to the Mweka Camp, stopping at Barafu for lunch. You may want gaiters and trekking poles for the loose gravel going down. We arrive at Mweka Camp and enjoy our last evening on the mountain.
Day 7: Mweka Camp to Mweka Gate, drive to Moshi
After breakfast we continue the descent down to the Mweka Park Gate to receive your summit certificates. At lower elevations, it can be wet and muddy. Gaiters and trekking poles will help. Shorts and t-shirts will probably be plenty to wear (keep rain gear and warmer clothing handy). Your team will be waiting for at the gate as they will receive with the Kilimanjaro songs plus traditionally songs while receiving your certificate from Kilimanjaro National park.
African Traces vehicle will be waiting for you at Mweka gate to drive you back to your hotel in Moshi (about 30 minutes)
Day 8: Tarangire National Park
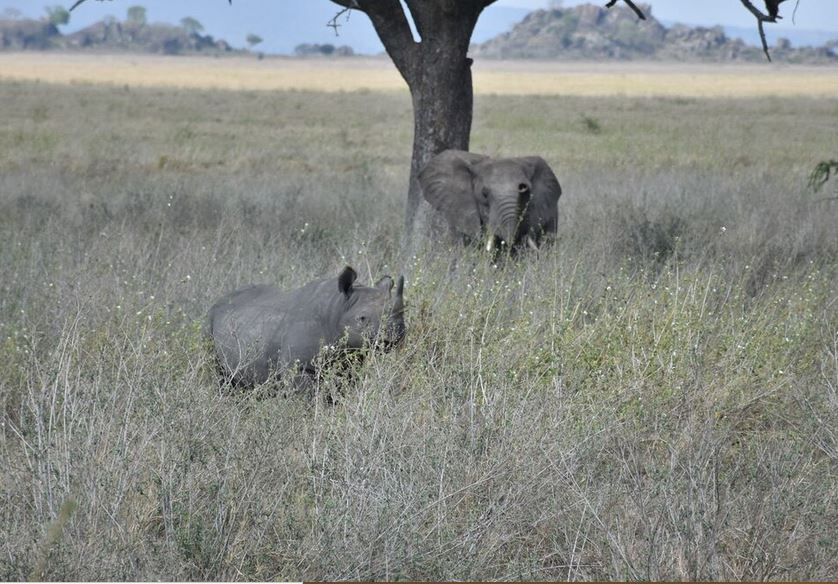
After a breakfast in the morning your safari guide will give a short briefing, you will be taken to the Tarangire National Park. The park with its endless tree savannah including the impressive baobab trees and seasonal marshes is also home to the largest elephant herds in northern Tanzania. In addition to elephants you are also likely to spot giraffes, buffaloes, lions, zebras, gnus and other types of antelopes and gazelles. Upon arrival at the park, your guide will open the roof of the vehicle and the extensive wildlife viewing will begin. Lunch will be taken at a picnic spot and in the afternoon you will get to see more of this amazing and beautiful park. In the late afternoon you will start driving to MTO WA MBU nearby Lake Manyara or straight to karatu for dinner and overnight at Marera valley lodge
Day 9: Serengeti National Park
After breakfast you will depart towards the Rift Valley, passing through Mto Wa Mbu and Karatu, in the cooler regions of the crater highlands. You will enter the Ngorongoro Conservation Area and stop for a short look into the crater from a viewing point. Continuing your journey around the crater, you will descend the other side, enjoying your free “African massage” raff road) on the bumpy road, passing Maasai villages on your way to the Serengeti National Park. Depending on the month if it will be the time that all the animals will be in the NDUTU you will go for game drive before interring at the Naabi Hill entrance gate. You can walk to a viewpoint with spectacular views across the plains of the Serengeti savannah. You will then continue towards the Seronera Area in the central part of the Serengeti. The park offers a multitude of wildlife including the Big Five – lion, elephant, buffalo, rhino and leopard. Late in the evening after the sunset you will arrive at the Serengeti serena safari lodge or at the campsite. For dinner and overnight
Day 10: Serengeti National Park
After breakfast, you will spend the whole day on a game drive in the Serengeti National Park and have lunch at a picnic spot en-route. Depending upon the time of year, you might even have the chance to witness the great migration with hundred thousands of wildebeests, zebras and Thompson gazelles. During the small rainy season in October and November, you will typically see these herds moving from the Kenyan Masai Mara through the northwest of the Serengeti to the plains in the south. After the great rainy season in April, May and June, the herds slowly travel back through the western and north-western part of the Serengeti. With fluctuations in rainfall, this timetable can of course change, resulting in the animals migrating during different times and routes. Your guide will try his outmost to find the animals and will make sure that you can see them from the best spot in the national park. Naturally, the migration also attracts predators and with luck you might see a kill in action. You will spend another night at the Serengeti serena safari lodge. Or comping
Something to know
please note, that should you travel between the beginnings of January until mid-March, you will stay at the Ndutu lake MasekTented lodge. As this place there’s no public campsite. Also situated in the Serengeti National Park but closer to the border of the Ngorongoro Conservation Area in the Ndutu Area. As the herds can either be on the Serengeti or Ngorongoro side this increases your chance of seeing the famous migration.
Day 11: Serengeti National Park – Ngorongoro Crater – Karatu
After early breakfast you will start your outward journey from the Serengeti back to the Ngorongoro Conservation Area, leaving behind the beautiful Seronera Valley. As predators are livelier on the road in morning hours of the day, you might even see them in action. Game en-route to Ngorongoro crater for game drive until lunch time. Where you will drive at a designated picnic spot for your lunch. The descending way into the crater on an adventurous trail. This World Heritage Site is seasonally home to over 25,000 animals in including a wide variety of birds, hyenas and the “Big Five” – lion, elephant, buffalo, rhino and leopard. Exiting the crater on a different ascent road, you will drive to Karatu in the Ngorongoro highlands, where you will spend the night at Marera valley or acacia form lodge for dinner and overnight.
Day 12: Karatu – Lake Manyara national park
After breakfasts drive down to the Rift valley heading to Lake Manyara national park for game drive. The park is known for its over 500 bird species, primate-filled forests and grassy plains. A large area of the park is covered by the alkaline but Lake Manyara national park won’t let you down when it comes to wildlife spotting. The seasonal breeding grounds for large colonies of flamingos and many more waterfowls. The park is also home to giraffes, hippos, wildebeests, impalas and groups of noisy monkeys and baboons. After an extensive game drive you will have your lunch then you will start driving back to Arusha, Moshi or Kilimanjaro airport this will be the end of the trip.
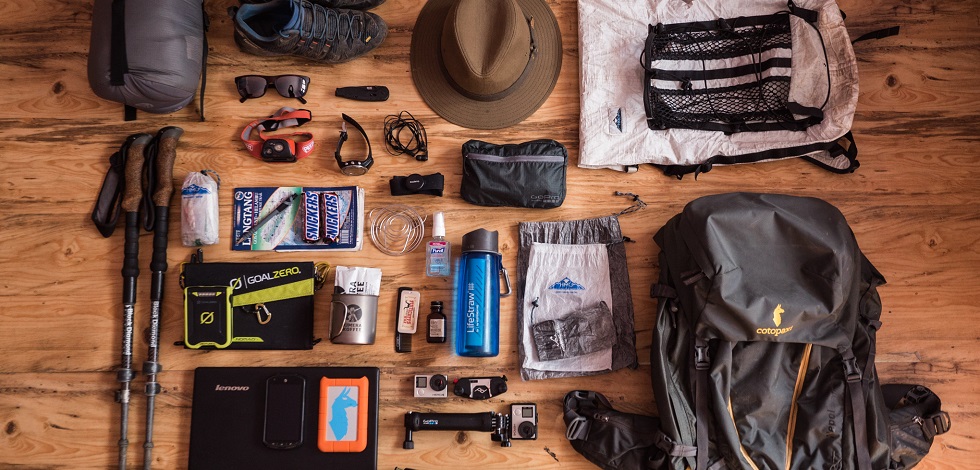
About Equipments
In order to enjoy your trek perfectly in the Mt.Kilimanjaro, having the right trekking equipment is essential –
both safety and comfort-wise. The trekking equipment essential depends on the type of trek, and on the time of
year, weather conditions, terrain, and maximum altitude.
What clothing and equipment to carry is mostly caused due to consideration than the other aspect of preparing for
an adventure travel trip? We usually receive a bundle of recommendations and suggestions, good and bad, on what
equipment is required for our trips. However, since being suitably equipped is that the single most important
consideration contributing to your welfare, we’ve provided the subsequent information which we ask you to look at
during a flexible manner, adapting it where you are feeling necessary to your own outdoor experience or preference.
There is a fine balance between taking excessive and insufficient, especially considering that you simply got to
equip yourself for all extremes of climate.
How Do I Prepare to Climb Kilimanjaro?
This section covers what gear you need to bring, physical training, Tanzania entry requirements (passport & visa),
immunizations and vaccinations, and travel insurance Please read this carefully and make sure you have gathered everything
before you depart on your trip.
What Gear Do I Need to Bring?
You are responsible for bringing personal gear and equipment while communal equipment (tents, food, cooking items, etc.)
is provided by African Traces Company. Below is a gear list of required, recommended and optional items to bring on your climb.
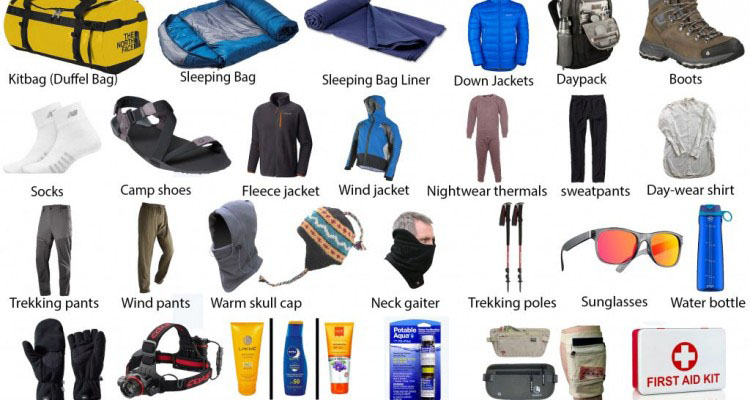
Technical Clothing
>1- Waterproof Jacket, breathable with hood>1-Insulated Jacket, synthetic or down.
>1-Soft Jacket, fleece or soft-shell
>2- Long Sleeve Shirt, light-weight, moisture-wicking fabric.
>1- Short Sleeve Shirt, light-weight, moisture-wicking fabric
>1- Waterproof Pants, breathable (side zipper recommended).
>2- Hiking Pants
>1- Fleece Pants
>1- Shorts (optional).
>1- Long Underwear, moisture-wicking fabric.
>3- Underwear, moisture-wicking fabric recommended.
>2- Sport Bra (women)
Headwear
>1 - Brimmed Hat, for sun protection> 1 - Knit Hat, for warmth
>1 - Balaclava or Buff, for face coverage (optional).
>1 - Gloves, warm (waterproof recommended)
>1 - Gloves, thin.
>Footwear
>1 - Hiking Boots, warm, waterproof, broken-in.
>1 - Gym Shoes, to wear at camp (optional)
>3 - Socks, wool or
>1 - Gaiters, waterproof (optional)
Equipment
>1 - Sleeping Bag, warm, four seasons*.>1 - Trekking Poles, collapsable (highly recommended)*
>1 - Head lamp, with extra batteries
>1 - 1 - Duffel bag, 50-90L capacity, for porters to carry your equipment
>1 - Daypack, 30-35L capacity, for you to carry your personal gear *may be rented on location
Accessories
>1 - Sunglasses or Goggles>1 - Backpack Cover, waterproof (optional)
>Insulated Jacket, synthetic or down.
>1 - Water Bottle (Nalgene, 32 oz.)
>1 - Water Bladder (Camelbak type, 3 liters).
>1 - Towel, lightweight, quick-dry (optional).
>1 - Pee Bottle, to avoid leaving tent at night (recommended).
>Stuff Sacks, Dry Bags or Plastic Bags, various sizes, to keep gear dry and separate
>Fleece Pants
>Shorts (optional).
>Long Underwear, moisture-wicking fabric.
>Underwear, moisture-wicking fabric recommended.
>Sport Bra (women)
Other
Toiletries,Prescriptions,Sunscreen,Lip Balm,Insect Repellent, containing DEET,First Aid Kit,Hand Sanitizer,Toilet Paper,Wet Wipes (recommended), Snacks, light-weight, high calorie, high energy (optional),{Electrolytes, powder or tablets (optional)},{Camera, with extra batteries (optional)} ,Paperwork,Trip Receipt,Passport,Visa (available at JRO), Immunization Papers,Insurance Documents.
Price Include
>>Private transport to & from Kilimanjaro International Airport to your accommodations in Moshi.
>>2 nights of accommodation in Moshi.
>>Transportation to & from the Kilimanjaro gate
>>Park entry fees,
>>Camping fees.
>>Team Kilimanjaro Rescue fees.
>>18% VAT on tour fees & services
>>4 Season mountain tents
>>Double layered Sleeping Mats
>>Friendly and professional mountain guides, cook and porters.
>>3 hot meals daily while on the mountain.
>>Enough treated & filtered drinking water throughout the trek.
>>Hot water for washing.
>>Fair wages for the mountain crew as approved by the Kilimanjaro National Park Authority (KINAPA), Kilimanjaro
Association of Tour Operators (KIATO)
>>Government taxes
>>Portable oxygen tanks & ox meter
>>Emergency first-aid kit.
Price Exclude
>>Lunches, dinners and drinks at your hotel before and after climb.>>Travel insurance
>>Flights.
>>Laundry (Available at hotel).
>>Personal items and toiletries.
>>Tips for guides, porters and cook (this is a guide to tipping on the mountain.
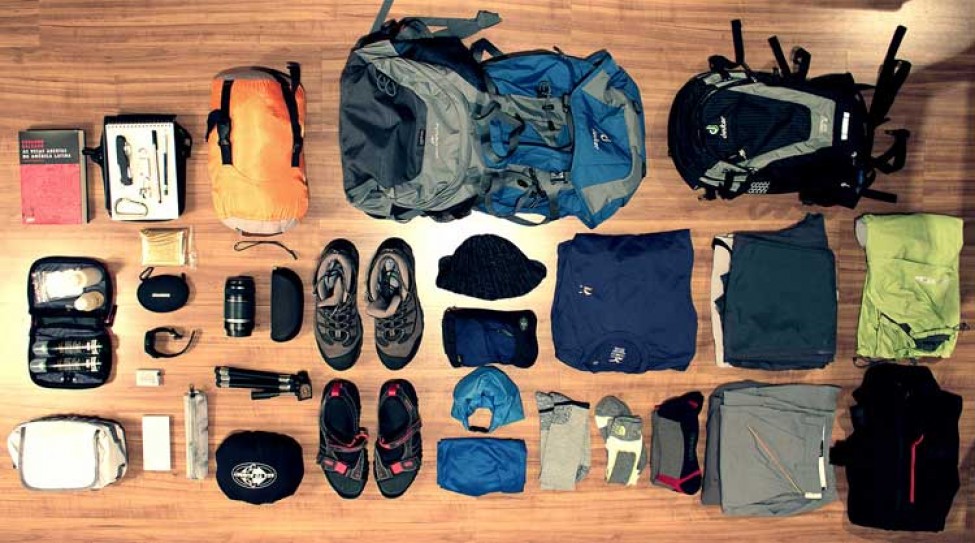
How to pack your day use for Kilimanjaro.
How to pack your day use on Kilimanjaro. African Traces-usually you will not see your duffel bag from the moment you hand it to the porter in the morning until evening in the camp or hut. It’s therefore necessary to pack everything that you may need during the day in your daypack that you carry with you.
>> Waterproof Jacket & Pants
>>Extra layer – you should carry one more layer (e.g. a fleece sweater) than you would be
expecting to need, given that days particular conditions
>>Small personal first aid kit (blisters, pain killers, antihitamines, any personal medication
e.g. asthma pumps). Although our guides will have it the first aid kit too.
>>Hand sanitizer
>>Toilet paper & ziplock bags to bring toilet paper, Tissue paper to the camp for disposal.
don’t bury paper, burn paper or litter the mountain!)
>>Sun screen & lip salve with SPF
>> Sun glasses
>> Hiking Pole(s)
>> Hat (Sunhat & wool hat as appropriate)
>> Buff or bandana (dust)
>> Camera/iPod etc
>> Hydration – e.g. camelbak &/or waterbottles min 3-4 liters, which we can refill the bottles
during the lunch time.
>> Passport & credit card in waterproof container e.g. ziplock plastic bag (in case of emergency
evacuation) But this can stay in the hotel for more safety.
>> Personal favorite snacks, candies, sweets etc.
This is normally about 5 or 6 kilogram’s. Every person will have their own. porter carrying the other
bag so nothing ever gets lost.
The porters are not allowed to carry more than 20kgs so please do not overfill your bags. They also
carry bags on their heads, even rucksacks, so it is probably more convenient to bring a duffle bag
for your gear. We will also put your bags into waterproof sacks in case of rain.
You can communicate with home.
Your mobile phone should work all the way up the mountain (slightly depending on which subscribe you
are using) as long as you have roaming access. Please note you cannot charge batteries anywhere on
the mountain. You may need to walk a little distance to find a spot with a signal.
Make sure you keeping dry and warm
There is doubt that you will have some rain, as the weather on the mountain is unpredictable.
And it is likely to be in the lower regions around the Montana or forest level. Waterproofs are
necessary; remember that on the equator the rainy season is traditionally March, April, May and
November.
Expect short term wheathe conditions, i.e. sharp showers of rain, hot sun, gusts of wind, snow
and low night temperatures. Clear nights will be colder but more beautiful, and generally the
cloud builds up mid-morning, only to dissipate again with the setting sun.
Above Shira Camp it might get snow, sleet and even hail. The ground is more open and exposed so
it will be important to have some dry bags for your day sack (or a cover) and all the
appropriate clothing for protection against the elements. Up higher at Barafu Camp it will be
colder and windier so the shell jacket is really vital; temperatures can drop dramatically, and
there may be snow. Summit morning can be icy underfoot, and very cold (minus 10°C) so good boots
with hats and gloves are important. The walking stick can be helpful at this time.
MT. Kilimanjaro Altitude Sickness.
If you are planning to climb Mount Kilimanjaro you will sooner or later hear about altitude sickness. For those unfamiliar with the ins and outs of altitude illness, here are answers to the most common questions regarding mountain sickness.
The definition of altitude:
>1. High Altitude: 1500 – 3500 m (5000 – 11500 ft)
>2. Very High Altitude: 3500 – 5500 m (11500 – 18000 ft)
>3. Extreme Altitude: above 5500 m (18000 ft)
What is altitude sickness?
Altitude sickness is a range of symptoms that can occur when someone ascends to a high altitude too rapidly, without sufficient acclimatization. The body can adjust to the reduced air pressure at higher altitude, but only at a rate of about 300 m (1000 ft) altitude gain per day. If you ascend faster, and everybody climbing Kilimanjaro will, then you may develop altitude sickness.
There are three main forms of altitude sickness:
>1.AMS (Acute Mountain Sickness): is very common when climbing Kilimanjaro.>2.HAPE (High Altitude Pulmonary Edema) : is a fluid build up in the lungs.
>3.HACE (High Altitude Cerebral Edema) : is fluid build up in the brain.
Both HAPE and HACE are potentially fatal but are thankfully rare during a well planned Kilimanjaro climb.
What exactly causes the individual symptoms of altitude sickness is still not fully understood. There is also a
range of other symptoms you are likely to experience during a Kilimanjaro climb due to the altitude.
They are
considered normal and shouldn’t worry you:
>you are out of breath sooner,
>you may experience periodic irratic breathing at night (where you stop breathing for up to 15 seconds, and then breathe very fast to make up for it, scary but harmless),
>you may wake up frequently at night,
>You need to urinate a lot more often.
None of those symptoms are altitude sickness.
What are the symptoms of altitude sickness?
The symptoms of AMS are headaches, loss of appetite, nausea, vomiting, sleeplessness, fatigue, dizziness. Everybody can expect to experience at least some of these symptoms in a mild form. The most obvious symptoms for HAPE are extreme breathlessness, even at rest; rattling breath, coughing with pink froth and blue lips or finger nails.HACE becomes apparent as a lack of coordination, inability to walk in a straight line, confusion and irrational behaviors (to the point of not acknowledging the symptoms).
How dangerous is altitude sickness?
The symptoms of acute mountain sickness as described above are self limiting and not dangerous. In fact, your guides
may tell you during the briefing not to worry, that it is totally normal to be vomiting repeatedly during that last final
push top the summit. Nice…
However, if you do experience symptoms, your guides should also keep monitoring you, because AMS can progress to one of the
more severe forms of altitude sickness. HAPE and HACE are potentially fatal! Make sure that you always remain in contact
with your guides and let them know exactly how you are feeling. Also keep an eye on your climbing partners, since people
suffering from these severe conditions may not be able to correctly assess their own condition. Anybody experiencing
symptoms that could indicate HAPE or HACE needs to descend IMMEDIATELY or they will die. But please don’t panic now.
As I said above, these conditions are rare, provided you act sensibly when on the mountain.
Who gets altitude sickness?
Anybody can get altitude sickness. There is no way to predict how your body will react if exposed to high altitude without proper acclimatization. Susceptibility to altitude sickness is random. Fitness is no protection. People who are extremely fit and exercise a lot get it just an easily as couch potatoes. There are many stories that indicate they may be even more susceptible! Men appear to be more susceptible than women, especially young and fit men. (Competitiveness and the desire to show off plays a part in this. Men will often ascend faster. Too fast.) Older people seem to be less susceptible. (Older people will ascend more slowly, and nothing protects you better from altitude sickness than ascending slowly.)
When do you get altitude sickness?
Highly susceptible people can experience symptoms from 2500 m (7000 ft) onwards, in rare cases even below that. The chance of developing AMS increases with the height but the rate of altitude gain is even more important.. Mt. Kilimanjaro is 5895 m (19340 ft) high. Pretty much everybody on a Kilimanjaro climb will experience some symptoms of altitude sickness during that last push to the summit. There are other factors that increase the likelihood of altitude sickness, apart from the absolute height itself:
>Rate at which a height is achieved (the faster you ascend the bigger the risk of developing symptoms, this factor is more important than the absolute height itself!)>Time spent at height (symptoms start appearing within 6-10 hours though they can be delayed)
>Physical exertion
>Dehydration
Symptoms of acute mountain sickness typically take one or two days to disappear. If you keep ascending they may not go
away. For most people the symptoms come and go during the day, disappear over night, only to come back the next day as the
climb continues. AMS can be very unpleasant, but with the right preparation and at a sensible pace, most people can climb
to at least the last camp below the crater rim (around 4700m). It’s that last push to the summit where AMS becomes the make
it or break it issue.
You climb Kilimanjaro with knowledge that every detail of your trip has been designed by one of the professional mountain
guide and high altitude experts. Your safety is our paramount concern on your Kilimanjaro trek. You leave home with the
comfort of knowing that during your trek all you have to worry about is putting one foot in front of the other. We take care
of the rest
Safety with African Traces company ltd
We are focus on safety when it comes on Kilimanjaro is our number one priority of both our clients and our team. The truth is every single year, climbers die on Mount Kilimanjaro due to its extreme altitude, if one is not properly monitored and treated. African Traces is the only Kilimanjaro company that trains its guides , Your guides monitor you every step of the way.
When you are on the mountain we do everything possible to ensure you remain healthy. We monitor your health closely to spot the early warning signs of problems. As a tour company we run a full Safety Management System. This begins with establishing clear safety objectives then looks at detailed risk assessments. Then we design our procedures to minimize those risks. We then listen to feedback to ensure that our safety protocols are continually improving
Every trip we provide with following
>Oxygen – For emergency use to ensuring that every trekker has easy access to emergency oxygen.
>First-aid, Trauma and Medicine Kits – Fully stocked as per Wilderness First Responder guidelines and including medicine instructions.
> Pulse-oximeter – To measure heart rate, blood oxygen levels and rapidly detects changes in blood oxygen level. The Head Guide checks, evaluates and documents blood oxygen levels and heart rate for each climber daily at dinner time and breakfast time.
> Radio call – Carried by all guides for daily communications with our base in Moshi.
> Safety Briefing – A full safety briefing is given by the Head Guide before each trek, covering expectations, risks, safety gear and preventative safety.
Medically Trained Team:
African Traces guides have high altitude experience, are qualified High Altitude First Responders, and are trained in Wilderness Emergency Medicine. This are guarantees that we run our trips to the highest standards.
Prior to your ascent of Kilimanjaro, we will make sure you understand what is provided for in our medical kit.
Our adventure First aid Kit
The truth is every single year, climbers die on Mount Kilimanjaro. Due to its extreme altitude and nonprofessional company, climbing Kilimanjaro can be quite dangerous if one is not properly monitored and treated. we are focused on safety. We understand that first and foremost, it is our main responsibility to keep all of our clients out of harm’s way. We recommend bring this medications with you, as shown in
Our medical kit containing the following,Wraps, Splints and Wound Coverings
> Triangular cravat bandage
> Rolled gauze
> First-aid cleansing pads with topical anesthetic
> Homeostatic (blood-stopping) gauze
Medications/Treatments
> Hand sanitizer (BKZ- or alcohol-based)
> Antacid tablets
> Throat lozenges
> Lubricating eye drops
> Loperamide tablets (for diarrhea symptoms)
> Insect sting relief treatment
> Glucose or other sugar to treat hypoglycemia
> Oral rehydration salts
> Dexamethasone
> Phenegan
> Hand sanitizer
> Biodegradable soap
> Water-treatment chemicals or water guard
> Hydrogen Peroxide
Tools and Supplies
> Paramedic shears (blunt-tip scissors)
> Standard thermometer
> Small mirror
> Medical / surgical gloves (nitrile preferred; avoid latex)
> Steel sewing needle with heavy-duty thread
> Small notepadwith waterproof pencil or pen
> Emergency heat-reflecting blanket
> Headlamp(preferred) or flashlight
> Stethoscope
> Pulse Oxymeter
Prior the climb be properly equipped
An essential part of your preparation will be to ensure that you are well equipped for your summit day Kilimanjaro gear list
Adequate travel insurance
Make sure that you have adequate travel and medical insurance, which will also provide you with cover for the climb up Kilimanjaro.
On The Mountain
Go slowly: “Pole Pole” as they say in Swahili! This is also very important during your first days of climbing. Even if you feel well, slow down and enjoy the scenery. The biggest cause of altitude sickness is ascending too high too fast! The slower you hike to more time you give your body to acclimatize.
Drink enough water: Make sure that you drink at least 3 – 4 liters of liquid a day – preferably water. Running water on the mountain is safe to drink we treaty it. If you are not used to fresh water in nature, prevent any inconvenience by using water purification tablets. Don’t forget that A functioning “body water balance” is one of the keys to a successful climb!
Walk high – sleep low: If possible and especially on your acclimatization day “walk high – sleep low” Try to do a short evening stroll to a higher altitude and then descend to sleep at the camp at a lower altitude.
Climb light: Climb as lightly as possible; this becomes even more important on your summit night. Extra weight will slow you down and will also make breathing more difficult.
Packing: Remember that you will be on the mountain for at least 5 or 6 days. You need to take enough clothing, especially socks to last for this period. Due to frequent rainfall as well as numerous streams on the routes, it is advisable to pack items individually in your bag. These individually packed items should be wrapped in plastic bags to prevent them from getting wet in case of rain or of being accidentally dropped in a stream.
New batteries: Replace your head lamp and camera batteries with new ones on your summit night.
Wet wipes: There is no washing water at Barafu, Kibo and Arrow Glacier camps. Wet Wipes are very useful
Snacks: Take enough snacks like energy bars etc. Avoid the toffee like energy bars (as they get very hard and difficult to eat in low temperatures) but rather but the cereal type energy bars.
Adequate sun protection: Wear a good quality pair of sunglasses (with UV protection) and use adequate sun protection cream with a protection factor of at least 20+.
Camera: Cameras exposed to cold do not cease functioning, but remember that if you keep your camera inside your jacket and the lens becomes warm, chances are that it will form condensation when suddenly exposed to extreme cold. This condensation will freeze under conditions at the summit. Therefore, keep your camera dry at all times. Moisture will freeze at the summit which will cause your camera to stop functioning.
Mountain water: The stream water high on the mountain Kilimanjaro has been tested and has been found to be fit for drinking.
Other useful tips:
> Make sure all your clothes and sleeping bag are packed in plastic bag inside the duffel
bag, to ensure they stay dry in the rain, even if your duffel bag is waterproof. Once something
gets wet on the mountain it is difficult, even impossible to dry!
>Something good Vaseline or Vicks Vaporub are good on the summit attempt.
Moist air coming from your noise or on your lips will freeze and become very uncomfortable
>Sound travel at night and many people snore on Kilimanjaro – bring some ear plugs to
sleep with.
> The trail is very dusty and sinus congestion is a problem with many hikers. Bring a good
decongestant spray or tablet.
>Female hikers suffer more from the cold than male hikers. Hand and feet warmers are a good
idea
> Travel with your most important gear as hand luggage – e.g. wear your hiking boots in the
plane – missing luggage is a common problem.
>Bring some blister plasters, Vaseline and liner socks. If you start to get blisters it will
help a lot.
>There is mobile reception on most of the mountain (except the first days on the Rongai
route). If you bring your mobile, make sure you activate international roaming. Because you cannot
recharge the battery, only have the phone on an hour or two daily.
> Something good Vaseline or Vicks Vaporub are good on the summit attempt.
Moist air coming from your noise or on your lips will freeze and become very uncomfortable
Medications on the Mount Kilimanjaro
When you are on the trekking you need this. Medications to make your trek safer please
bring the following prescription medications, which our medically qualified guides are
familiar with.
The information is not a substitute for medical advice. Always consult
your doctor or pharmacist and see if you have problems with taking these medications.
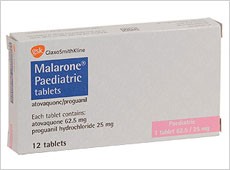
MALARON: Generic name: ATOVAQUONE 250mg, PROGUANIL HYDROCHLORIDE 100mg
MALARONE prevention for Maleria you should take it just to prevent you from getting malaria.
This medication contains 2 medicines: atovaquone and proguanil. It is used to prevent and treat
malaria caused by mosquito bites in countries where malaria is common. Malaria parasites can
enter the body through these mosquito bites, and then live in body tissues such as red blood
cells or the liver. This medication is used to kill the malaria parasites living inside red
blood cells and other tissues. In some cases, you may need to take a different medication
(such as primaquine) to complete your treatment. Both medications may be needed for a complete
cure and to prevent the return of infection (relapse). Atovaquone/proguanil belongs to a class
of drugs known as antimalarials.
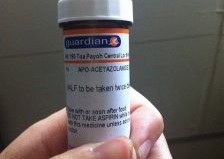
DIAMOX:(Acetozolamide) -2 x 125 mg per day
DIAMOX = Altitude adjustment you should take them because this can prevent and remove
the AMS what is does in the body is to change the acidity from the blood to normal. This drug
is prescribed for altitude acclimatization, and should be started 2 days before your climb,
and stopped after you reach the highest elevation on the trek. We advise you to start 2 days
prior to climbing in order to ascertain whether you any adverse reaction to it. [Addition]
Acetazolamide, or Diamox, is the standard medical prophylaxis agent for high
altitude illness.
The medication is effective in preventing acute mountain sickness (AMS), high altitude pulmonary
edema (HAPE), and high altitude cerebral edema (HACE).
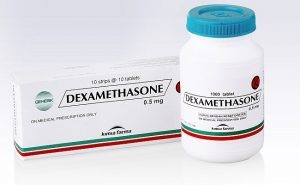
DECADRON:(Dexamethasone) – 4mg x 8 tablets. Is for several headache, this
can be taken when you severe headache to remove pressure from the brain. Brain swelling your
guide may ask you to take this medication if you develop a severe headache due to Acute
Mountain Sickness, and must descend urgently. You do not take this drug during the ascent.
This steroid reduces inflammation of the brain, which is the cause of headaches resulting from
Acute Mountain Sickness. You will only be using this medication in conjunction with your descent
due to severe headache. If a climber does not acclimatize naturally and continues to suffer the
effects of Acute Mountain Sickness, then it is our policy for you to descend immediately.
Dexamethasone may be considered as first-line therapy when a rapid, unplanned ascent is
required, such as in rescue operations. 3 Multiple trials have confirmed that dexamethasone is
superior to acetazolamide for preventing acute mountain sickness during rapid ascent.
ZOFRAN(Ondansetron) – x 12 dissolved tablets. Or bring Phenegan,
this is for nausea and vomiting In the event you develop severe nausea due to acute
Mountain Sickness, this drug reduces nausea without any side effects.
We may use this once on the
ascent, to gain a few hours to allow you to acclimatize. If a climber does not acclimatize
naturally and continues to suffer the effects of Acute Mountain Sickness, then they will
always descend.
TINDAMAX(Tinidazole) – 1 complete course for protozoan diarrhea. Tinidazole Is
for stomach upset, stomach unsettled, this can kill bacteria in the stomacg in case there
is an infection, is also for anti-parasitic drug used against protozoan infections. It is
widely known throughout Europe and the developing world as a treatment for a variety of
amoebic and parasitic infections. A derivative of 2-methylimidazole, it is a prominent member
of the nitroimidazole antibiotics.
CIPRO ANTIBIOTIC – 1 complete course for traveler’s diarrhea.
Ciprofloxacin is used to treat or prevent certain infections caused by bacteria such
as pneumonia; gonorrhea (a sexually transmitted disease); typhoid fever (a serious infection
that is common in developing countries); infectious diarrhea (infections that cause severe diarrhea);
and infections of the skin, bone, joint, ...
AMBIEN:Generic name: zolpidem tartrate 5mg .Zolpidem is used to treat sleep problems
(insomnia) in adults. If you have trouble falling asleep, it helps you fall asleep faster,
so you can get a better night’s rest. Zolpidem belongs to a class of drugs called
sedative-hypnotics. It acts on your brain to produce a calming effect. (As a professional medical
guide not advice to use this during your climb because may slow your breathing system)
IBUPROFEN- is a medication in the nonsteroidal anti-inflammatory drug (NSAID) class that
is used for treating pain, fever, and inflammation
Toilet on the Mountain Kilimanjaro
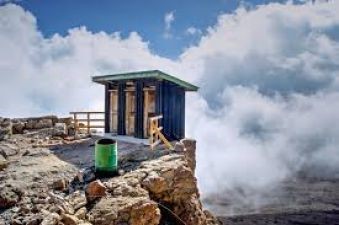
Firstly, let’s put your mind at rest. There are public toilets at every camp stop on a
Kilimanjaro trek you’re going to need to lower your expectations though. Forget porcelain
loos with lockable doors, marble sinks with soap dispensers, hot water and hi-tech hand
driers. We’re talking about a wooden shack (usually without a door, let alone a lock) that
surrounds a deep hole in the ground.
You’ll have to get used to squatting and near-zero privacy. Also, while Kilimanjaro National
Park staff do their best to keep these facilities clean, it’s an uphill struggle because
almost everyone on the mountain uses them. This means that the erm, bouquet, of Kilimanjaro’s
public 'long drop' loos can often be a) challenging and b) cut with a knife. However, the
natural views afforded by these dunnies are sensational so… swings and roundabouts.
Help! I’m shy. Can I get a private toilet on Kilimanjaro?
Trekking Kilimanjaro is an immensely bonding experience. In time you’ll come to regard your
guides, porters and fellow trekkers as honorary brothers and sisters. All the same, this
doesn’t necessarily mean you’d be comfortable ‘dropping your fudge’ in front of them. Don’t
panic. There is an alternative to the ‘toilet shack’.
The second option is the ‘portable private loo’. This amounts to a proper chemical toilet (with a seat, no less!) that is contained within its own discreet tent for total privacy (if not soundproofing). A portable private loo is for the exclusive use of you and your group only. As with the shacks, though, it is only set up and available in camp.
The trek’s porters are responsible for cleaning, maintaining and transporting the loo between camps, so at least you have the assurance that your ‘comfort breaks’ will be sanitary and conducted in privacy.
I’m between camps on Kilimanjaro and I need to go to the loo! What now?
Getting ‘caught short’; It happens to all of us. Ignoring the urge and attempting to ‘hold it in’ for hours on end is inadvisable and can actually be dangerous. However, wetting/soiling yourself is not a great solution either. People will notice.
Now, if you simply need a pee the solution is to swallow your pride and disappear behind the nearest tree or bush for a couple of minutes. To avoid consternation/embarrassment, you might want to let your guide know. Things get trickier above the tree line. You might get lucky and find a sizeable shrub to spare your blushes; failing that you’re not usually far from a suitable boulder or rock formation.
Going to the loo on Kilimanjaro: a final thought
Going to the loo might not be the most glamorous pastime, but believe me, when you’re answering the call of nature in the magnificent surroundings of Mount Kilimanjaro, it’s part of a life-changing experience that’s far more exciting and memorable than staring down at your bath mat. No matter how many multivitamins you’ve taken.
Toilets on Kilimanjaro and What to Expect When Doing Your Business
The camping facilities and toilets on Kilimanjaro are rather basic. For some the biggest complaints are the toilets on Kilimanjaro. Let’s just say the loos leave much to be desired.
So what can you do to improve your ablution experience on Kilimanjaro
Going to the toilet is an intensely personal experience. Doing so whilst camping on a 6 or 7 day hike however takes the ‘personal’ and the ‘experience to a whole new level.
On Kilimanjaro there are really only two toilet options.
Option 1 – Use the toilets on Kilimanjaro
This option is chosen by most climbers and is probably why so many people complain. If you decide to use the toilets on Kilimanjaro then set your expectations really low and you won’t be too disappointed. Bring your own toilet paper (2 rolls should be more than sufficient) and a sachet of baby wipes – these are great for cleaning in general.
Option 2 – Hire a Kilimanjaro Portable Loo
Most climbing companies offer climbers the option of taking a portable loo up the mountain. Portable loos are nifty little devices that come with their own mini tent and work a dream. The loo is carried by a porter and setup at each camp. Typically the cost of hiring a portable loo is $150, which may seem a lot, but if you are in a group with two or three other climbers it can be very affordable. For the privilege of being able to use a portable toilet you would need to spend some money to break even. That’s not the case with African Traces the use of a portable private toilet is included as standard with every one of our climbs because we look after the needs of our trekkers and don’t cut corners (end of own-trumpet-blowing).
Portable loos may sound a little extravagant and maybe they are. But at the end of the day if they make your climb more enjoyable we would argue that they are a good investment. A nice little portable loo and tent
Another option
Finally, you will notice that some people take the opportunity to go native on Kilimanjaro and do their ‘business’ in the bushes on route. If you do need to go during the trek and in between camps then please don’t leave your dirty toilet paper lying about. Take a small plastic bag with you for your rubbish and dispose of it when you get to your next camp.
How does a long drop toilet work?
A long drop toilet, also known as a pit latrine, collects human feces in a hole in the ground where the toilet is located and can work with or without flowing water. Long drop toilets work to decrease the amount of spread of disease and the transfer of pathogens from flies.
How do you make a toilet drop longer?
The longest that you can make your long drop toilet as far as the ground level goes is 1 meter deep, and you will have to dig a new one once you fill your current one up to 330mm. You will also have to cover the long drop completely with soil after it is filled.
What is a long drop?
A long drop is a type of non-flush toilet that collects waste underground. This low cost type of toilet helps decrease the spread of infectious diseases.